Competition Settings
Guest Division
Guest division allows for separating guest teams from regular teams in many views. The settings for guest division can by found by clicking on “Admin Area” > “Competition Settings” > “Guest Division”. A screen like the one below will appear.
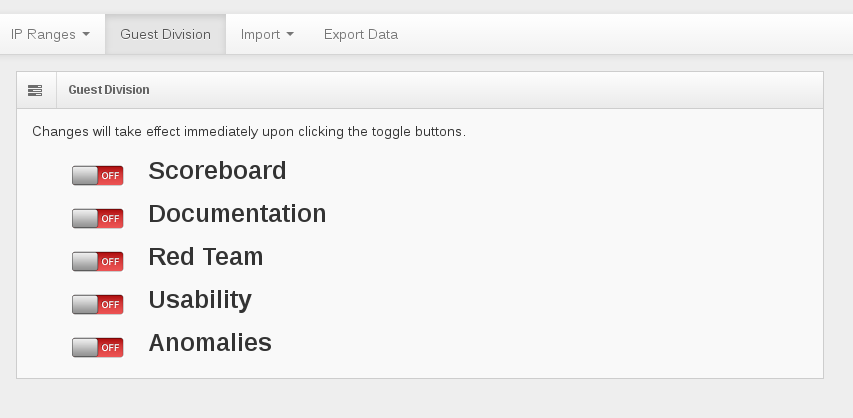
To enable guest division for each category click on the button on the left and it should turn green indicating that guest division is activated for that category. Click the button again to turn it off. The categories and what they affect are described below.
- Scoreboard
- Will create a section at the bottom of the scoreboard under which all guest teams will appear. Guest teams will not affect the placement of other teams but they will be ranked within themselves. The scorecard for guest teams will also display the place the team would be in if they were not a guest team.
- Documentation
- Will create a second section of graded/ungraded submissions for Green Team Documentation, White Team Documentation, and Intrusion Reports.
- Red Team
- Will create a section at the bottom of the red team overview and earnback screen under which all guest teams will appear.
- Usability
- Will create a section at the bottom of the usability check screen under which all guest teams will appear.
- Anomalies
- Will create a column in the anomaly tables for the guest teams to appear in.
IP Ranges
IP ranges can be managed by clicking on “Admin Area” > “Competition Settings” > “IP Ranges”. A screen like the one below will appear.
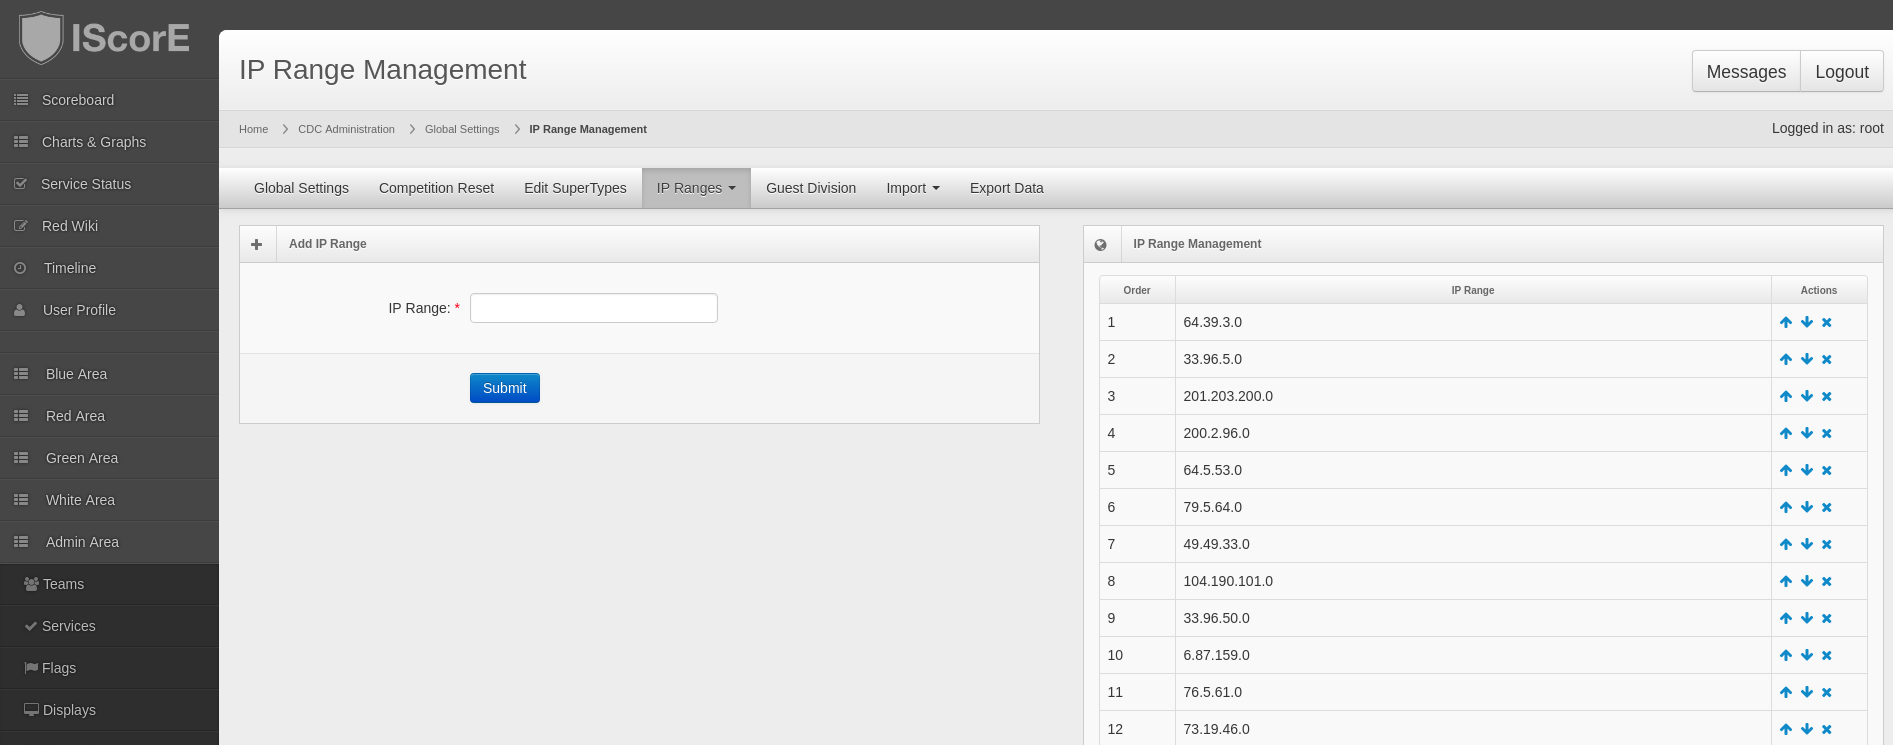
Note
IP ranges should be of the form xxx.xxx.xxx.0 and should NOT be in CIDR notation. All ranges are assumed to be
/24.
Add an IP Range
- Enter the desired IP range in the “IP Range” field.
- Click the blue “Submit” button.
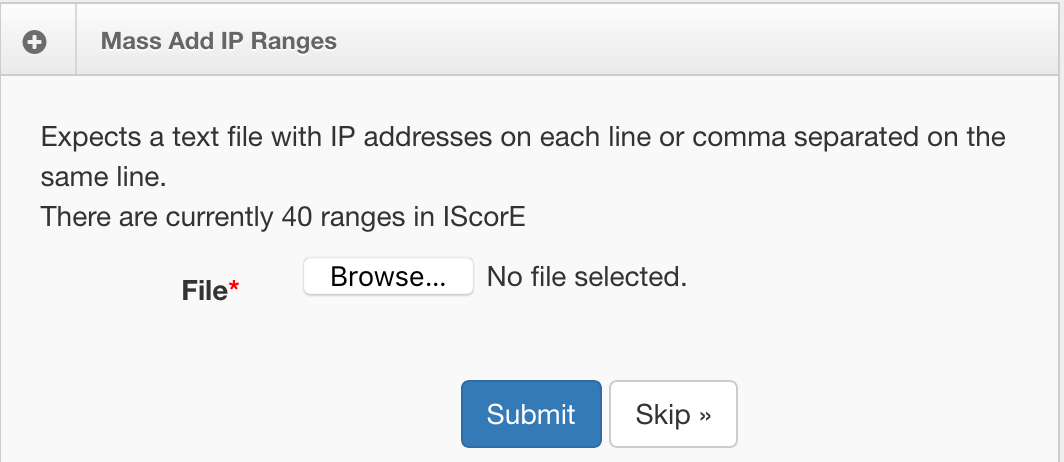
Mass Add IP Ranges
- Click the blue “Mass Add IP Ranges” button.
- Upload a text file with the IP ranges each on their own line, comma separated, or a combination of the two.
- Click the blue “Submit” button.
Changing Super Types
Click on “Admin Area” > “Competition Settings” > “Edit SuperTypes”. A table of scoring categories will appear, like the one below:
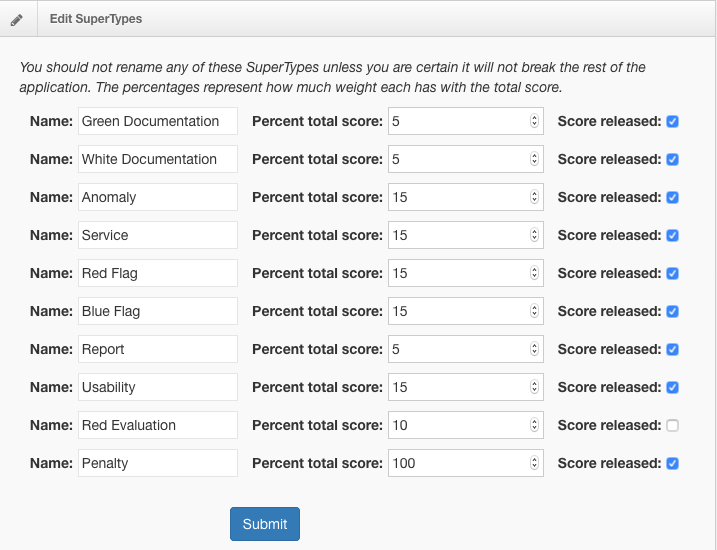
Change the weightings and released status for the scoring categories as desired.
Warning
DO NOT change the names of Super Types. The scoring system does not expect them to change and will break if they are modified.
Click the blue button in the bottom right corner to save your changes.
Main Settings Form
Competition Settings
- COMPETITION NAME
- The name of the competition.
- NUM BLUE TEAMS
- The number of blue teams in the competition
- TOTAL POSSIBLE SCORE
- The maximum score possible. Don’t change this unless you know what you are doing.
- GLOBAL RED WIKI ACCESS
- When checked, the Red Wiki will be publicly viewable by everyone. Additionally, blue teams will be able to see flag capture notes and the Red Team Summary which includes the Red Evaulation breakdown and some team-specific flag statitstics.
- LOCKDOWN ENABLED
- When checked, IScorE will go into lockdown mode. Only admins will be able to view IScorE. This is used at the end of a competition before the winners are announced.
- SPONSORS ROTATE INTERVAL
In milliseconds, how often the sponsors should rotate.
New in version 2.0.
- ENABLE SPONSORS
- Enables sponsor logos in the bottom right corner and on displays. See Sponsor Logos for more information.
- TEAM DOMAIN SUFFIX
- This is the value that will be used by IScorE as the base domain for every team. For example, if set to
iserink.orgall teams will have domain names of the patternteamN.iserink.orgby default. - DISABLE TEAM INFO CHANGE
Whether or not the team will be able to change their name, organization, or logo.
New in version 2.0.
Service Scanner Settings
- SERVICE SCAN START TIME
- The time at which the service scans start affecting the score. Also known as the start of the Attack Phase.
- SERVICE SCAN STOP TIME
- The time at which the service scans stop affecting the score. Also known as the end of the Attack Phase.
- SERVICE SCAN USERNAME
- The service scanner will default to using this value as the username where applicable.
- SERVICE SCAN PASSWORD
- The service scanner will default to using this value as the password where applicable.
- ENABLE SERVICE SCANNER
- Determines whether the service scanner should run or not.
Announcement Settings
- ALERT BANNER MESSAGE
- When set, a banner will be displayed with the value on every page.
- ALERT BANNER COLOR
- The color the alert banner will be displayed with
Countdown Settings
- COUNTDOWN ENDTIME 1/2
- The time that timers 1 and 2 will count down to. This will be displayed on the scoreboard. This is usually used to display the time remaining before the competition or end of the attack phase.
- COUNTDOWN MESSAGE 1/2
- The message displayed while the countdown timer is running
- COUNTDOWN END MESSAGE 1/2
- The message that will be displayed when the timer has finished. If both timers are defined, the timer that finishes later will be displayed instead.
- COUNTDOWN BANNER COLOR 1/2
- The color the countdown timer will be displayed in.
DNS Settings
- DISABLE DNS
- If checked, teams will be required to provide their own DNS servers. See Competitor DNS.
- DISABLE DNS MESSAGE
- The message displayed to teams if
DISABLE DNSis checked.
Competition Reset IScorE
Follow this process so that IScorE can be used for a new competition.
Danger
Follow this process will delete all data from IScorE. There is NO undo.
On the left side-bar menu, click “Admin Area” if it is an option.
On the left side-bar menu, click “Competition Settings”, a page like the one below will appear.

In the navbar in the middle page, Click “Competition Reset”, a like the one below will appear.
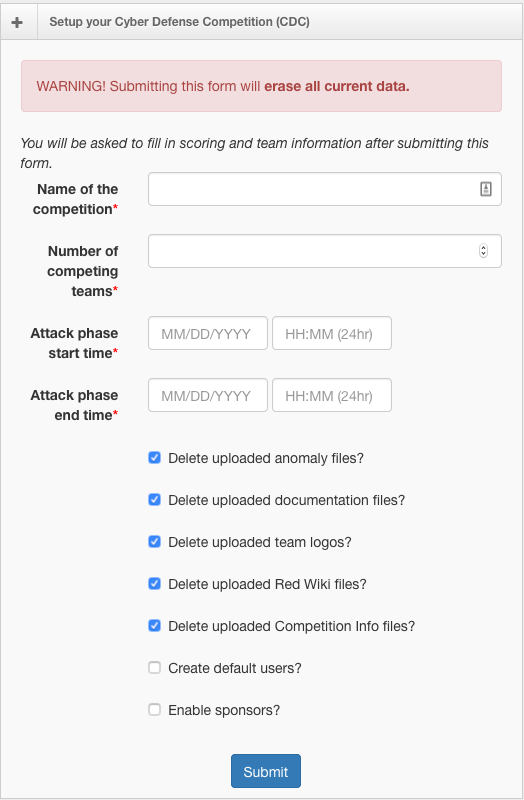
- Name of competition
This will become the global setting
`COMPETITION_NAME.- Number of competing team
This will be the number of teams at the CDC. IScorE will create number of teams indicate here. You can add more teams later. This will
NUM_BLUE_TEAMSglobal setting.- Attack phase start time
When the attack phase will start in mm/DD/YYYY and time in 24-hour format. This will become the global setting
SERVICE_SCAN_START_TIME.- Attack phase end time
When the attack phase will end in mm/DD/YYYY and time in 24-hour format. This will become the global setting
SERVICE_SCAN_END_TIME.- Delete uploaded anomaly files?
Checked by default, if checked will delete files uploaded to anomalies.
- Delete uploaded documentation files?
Checked by default, if checked will delete uploaded instruction reports, white team documentation, and green team documentation.
- Delete uploaded Red Wiki files?
Checked by default. if checked will remove all files uploaded to the red wiki.
- Delete uploaded Competition Info files?
Checked by default, will delete all files uploaded to the green “Competition Info” area.
- Create default users?
Not checked default, if checked IScorE will create some default users, listed below (username:password):
- red:red (User in red role)
- white:white (User in white role)
- green:green (User in green role)
- teamN:teamN (user in blue role on team N)
- Enable sponsors?
Not checked default, if checked will set global setting
ENABLE_SPONSORSto true, otherwise will set global settingENABLE_SPONSORSto false.
Click “Submit”
Danger
Clicking submit will delete the selected files and ALL data from IScorE.
A screen like the one below will appear. See Changing Super Types.
Make your changes and click “Submit”
Next a screen for Mass IP Adding IP ranges will appears. You can upload text file in the format of one IP line. Not in CIDR format. Select your file and “Submit” or “Skip”. IP ranges are not deleted during the competition reset.
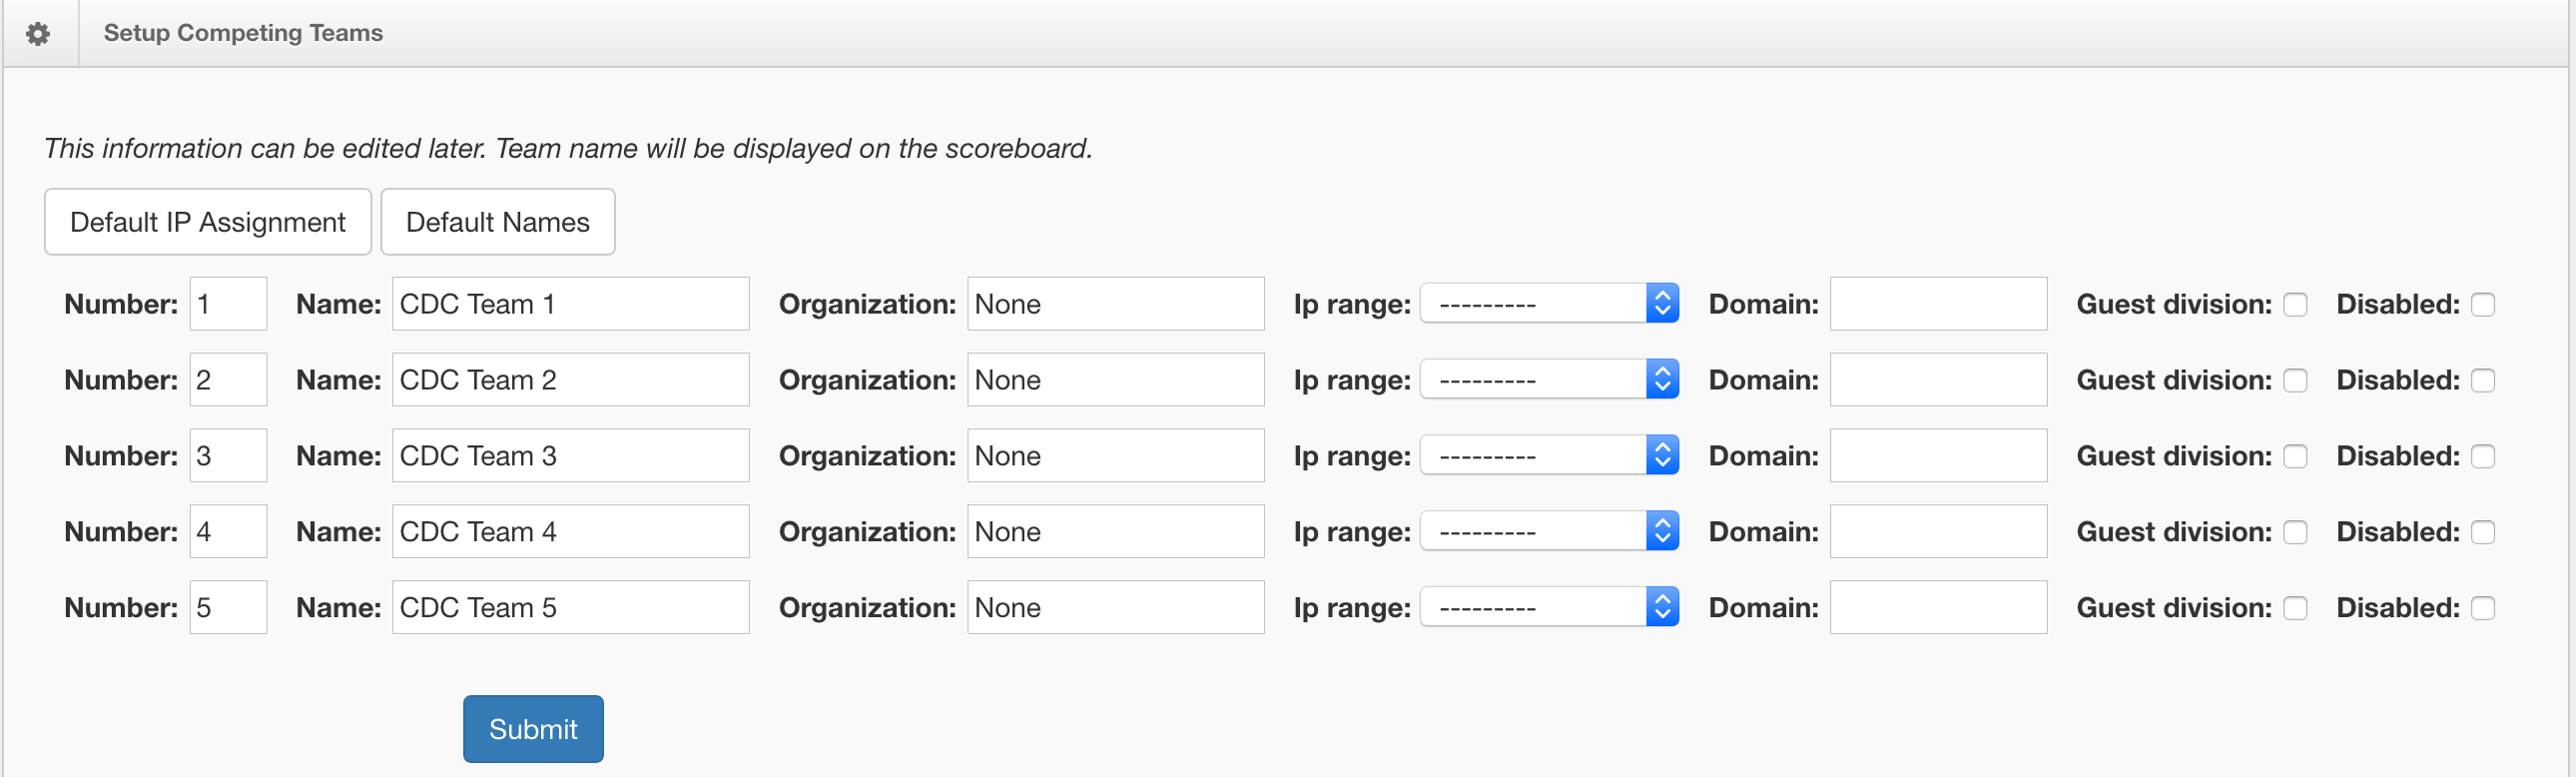
Now the Bulk Team Edit Screen will appear. If have IP ranges click “Default IP Assignment”. See Bulk Edit Team Information.
Click “Submit”
You will redirected to the “Flag Overview”
Rubrics
You can modify the rubrics of White Team Documentation, Green Team Documentation, and intrusion reports.
Modify a Rubric
On the left side-bar menu, click on “Admin Area”.
On the left side-bar menu, click on “Competitions Settings”. A page like the one below will appear.
Click on “Rubrics” in the navbar in the middle of the page, then select your which rubric you want to edit.
A form will appear. Like the one below:
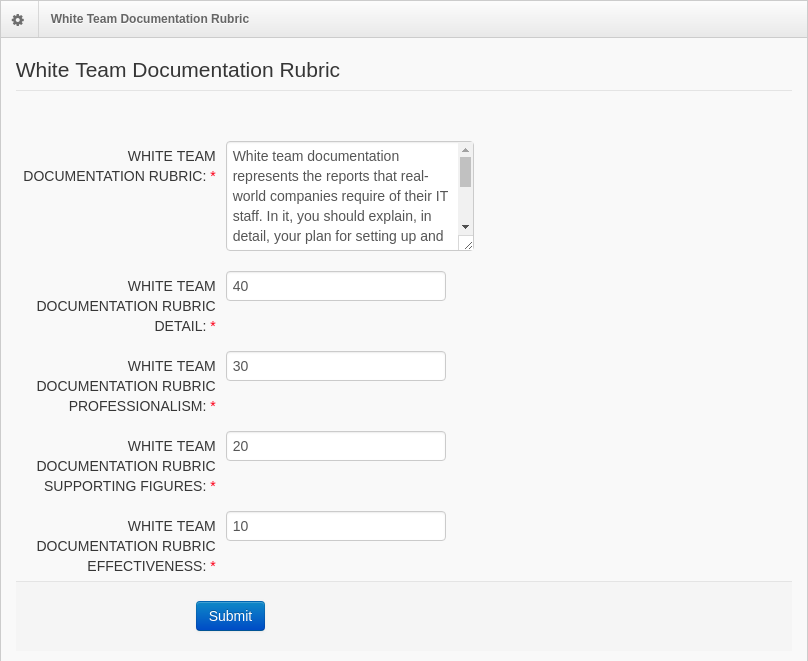
Enter the value you want for your rubric The top text area is a text description of what is expected and the will be a varying number of fields below based on the type of rubric that sets the max scores for each part of the rubric.